How to share files with your Mac in a network
Sharing files with AirdropAre you in a Wi-fi network with multiple Macs? Then you can use Airdrop to share files. It's as easy as throwing a ball.
How does Airdrop work?
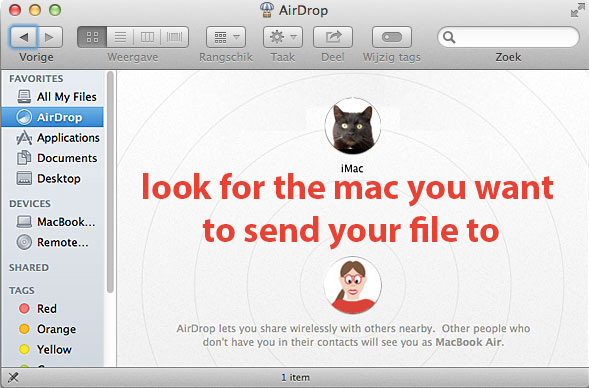
Go to the Side Bar to Airdrop and see who's online. Look for the Mac that you want to send a file.
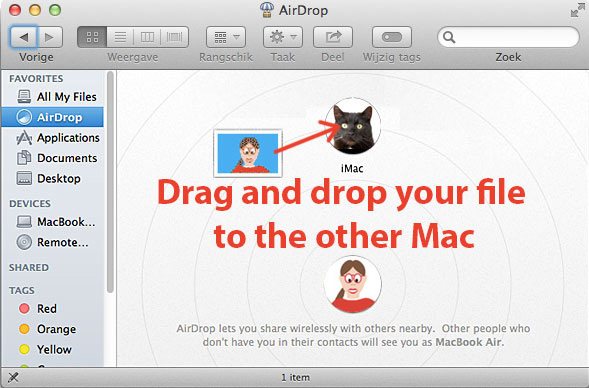
Take the file, and drag and drop it to the Airport icon of that particular Mac.
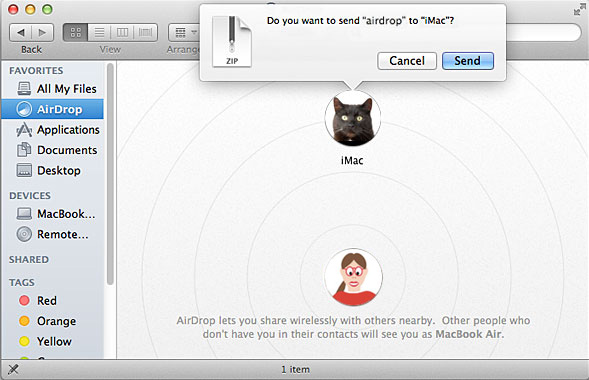
A pop-up will appear, asking you if you're sure:
Then the other Mac will get a pop up message
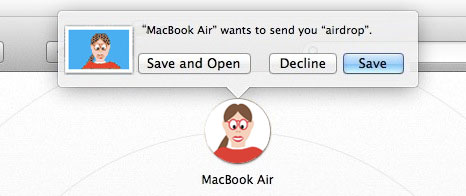
A pop up message will appear on the Mac that you just threw the file to. The Mac's owner has to approve to receive the file:
Receiving data files with Airdrop
When someone wants to send you a file, a message will appear. You only have to give the okay and the file will be yours.
Je krijgt vanzelf een bericht dat iemand je wat toe wil sturen. Je hoeft alleen even toestemming te geven en hop, daar is het bestand al.
NOTE: the file will land in the Documents folder.
NOTE: Airdrop works only with Macs thar are at least equipped with Mac OS 10.7 Lion.
Networking with Windows, Linux and/or Macs
What needs to be done to let your Mac share files with other computers?
First, you need to connect your Mac to an existing network. This can be though a cable or Wi-Fi.
Second, you need to allow your Mac to share files.
Making a connection to an existing network
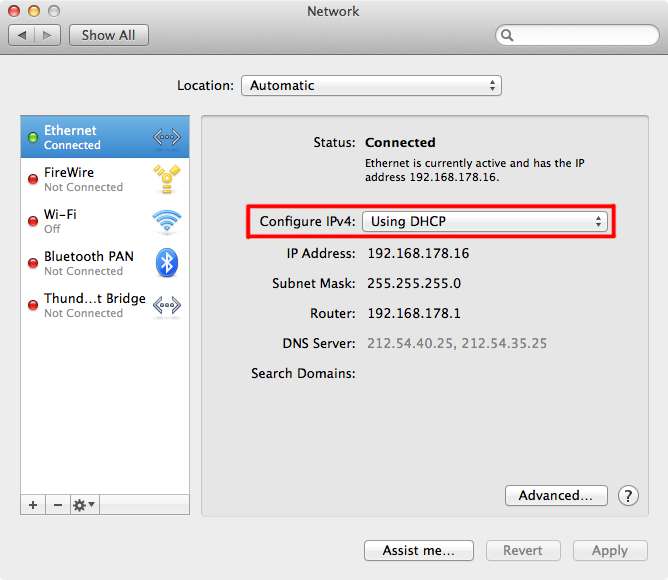
Let's start with making the connection. Go to System Preferences and choose Network.
At the left, you see the connections that are possible. Choose the one the network is using: Wi-fi or Ethernet.
Then you can find all details of that connection to the right. Ask the network administrator about what next:
1. In case of a dynamic IP-address:
This requires no specific information. Your Mac's at this setting at default.
So in case of a network that uses dynamic IP-adresses, you choose Using DHCP. All the other fields will be filled in all by itself. This is the way most modems and routers work.
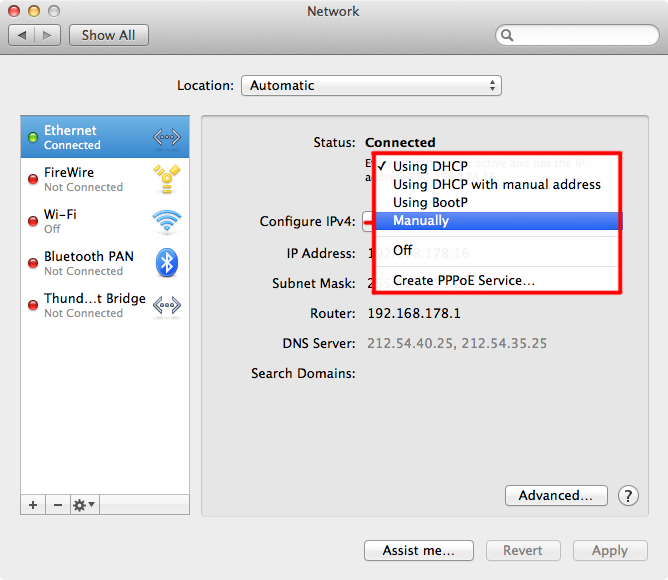
2. Connecting with a specific IP-adres:
Now you need login data. Ask your Network Administrator for this. Choose Configure Manually.
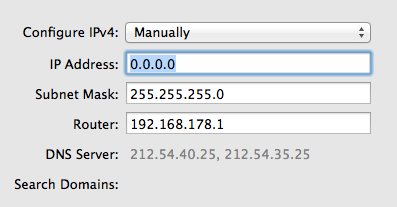
Are you finished? Then click Apply.
You're Mac is now ready to approach the other computers in the network.
NOTE: An IP-address is a number containing four digit qeus with points in between, for example 123.123.123.123. It's the unique number that makes computers recognizable in a network. All internet addresses also have an IP number. The World Wide Web still uses the IP version 4. It won't take long before all addresses are filled up. Than the Internet has to switch to IP version 6. Your Mac is prepared for this.
Connecting to the network
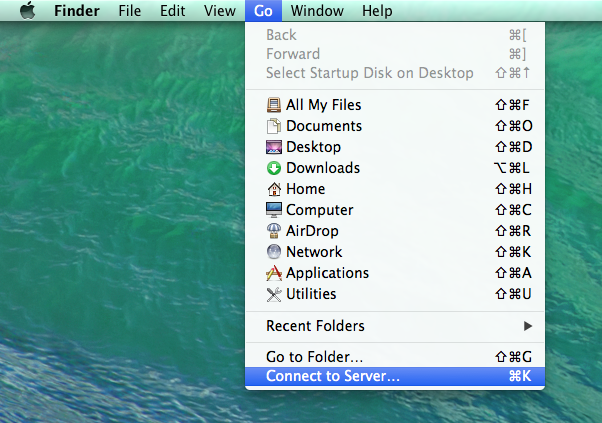
You can approach the network now. Go in Finder under the Go menu to 'Connect to Server...'.
Choose Browse or enter the name of the server.

Then choose ‘Guest’ or use the password /login name that the Network Administrator gave you.
BEWARE: Connecting to a network is one thing. To share files on your Mac that's something else. This is on both sides, the Mac and Server (the computer you want to download or upload files to) side. Seeing each other is not enough.
Keep in mind that connection and sharing are two different things. One can't work without the other.
Sharing files
We've just seen how your Mac connects to a network and logs on to a server. The second step will be to make the Mac able to share files. For this, you have to give your Mac permission first.
System Preferences => Sharing
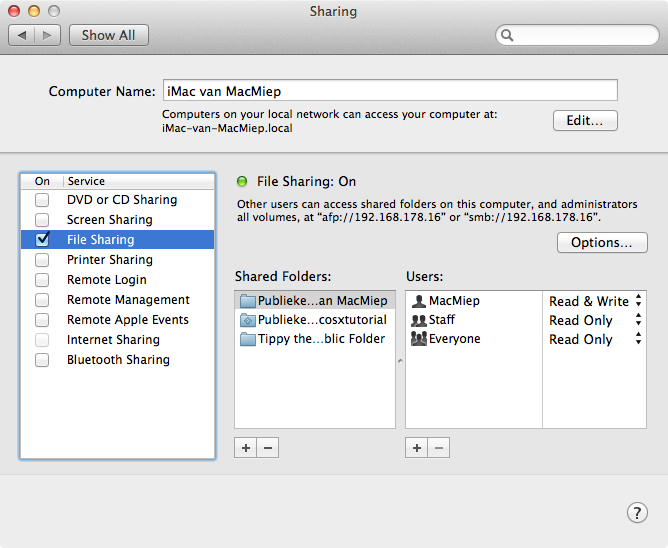
At default, your Mac is closed to others. So giving permission to share files is done in System Preferences => Sharing.
In the Computer Name: field, you may should type a name for your Mac. One that makes you easily recognizable in the network.
Now check the boxes that you want to allow your Mac to do, in this case 'File Sharing'.
In a network with Macs only, you're finished now.
A network with Windows or Linux computers.
Choose 'Options'. Now choose the correct network protocol by checking 'Share files and folders using SMB'
Now Linux and Windows computers can see your Mac. They can log on to your Mac as a Guest and take a peek into your Public folder and Drop Box (more about both folders in a moment).
This should be suffcient for most users.

Opening your Mac -completely- to others
However, do you want to share ALL your folders: check the box with your Account Name also (be really sure you want this).
The Mac will ask you for the password that fits the Account Name.

NOTE: This way of giving other computers all access to your user folders might be convinient, but do realize this is not very secure! Just using the standard methoud of accessing the Public Folder and Drop Box is much more safe.
However, do you want to share ALL your folders: check the box with your Account Name also (be really sure you want this).
The Mac will ask you for the password that fits the Account Name.
NOTE: This way of giving other computers all access to your user folders might be convinient, but do realize this is not very secure! Just using the standard methoud of accessing the Public Folder and Drop Box is much more safe.
The Public Folder and Drop Box
When another computer logs onto your Mac, it will be able to see only two folders: the Drop Box and the Public Folder.
Public is used to download files from and Drop Box is for uploading.
Where can I find that Public folder?
This is a special case. The Public folder is located at your User folder, but not shown at default. Go to the Finder menu and then to Finder Preferences. Check the box at your User folder (house icon).
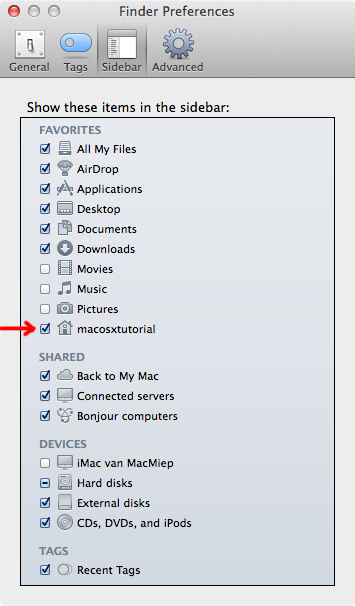
From now on, in every Finder Window you'll find your Home folder. Click it and the a folder called Public will be in it.
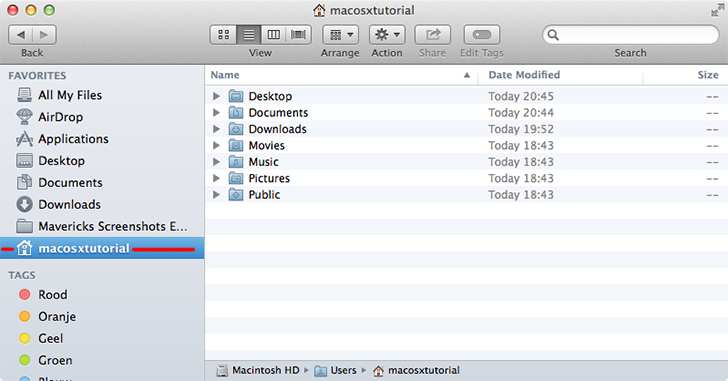
You can find the Drop Box folder in the Public folder.

TIP
Drop Box: changing privigeles
Network users only are allowed to drop things in the Drop Box folder. They are not allowed to peek.
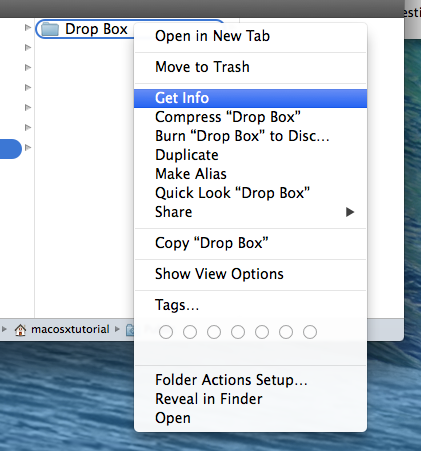
Would you like them to see what is in the Drop Box? Then you have to change the Sharing Permissions of the Drop Box folder.
Opening Drop Box to other eyes
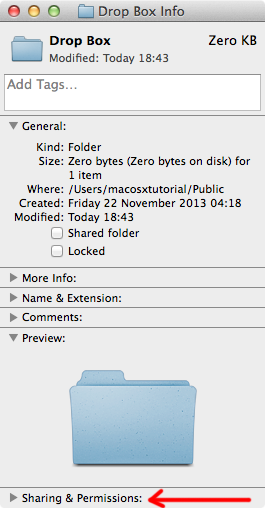
Select the Drop Box folder. Choose 'Info' from the File menu.
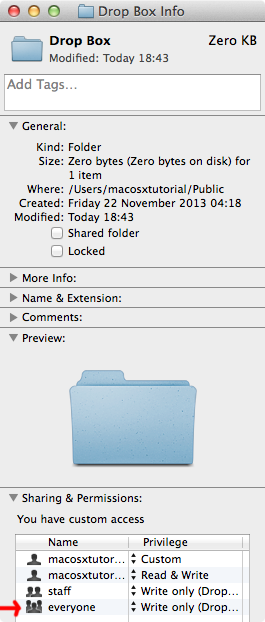
At 'Sharing & Permissions' you'll find several settings.
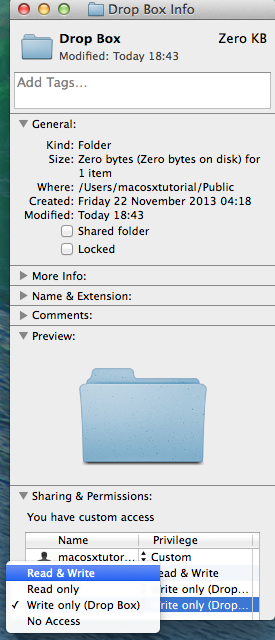
Change the setting at 'Everyone' into 'Read and Write':

TIP
Opening more folders
Would you like to let your network palls take a peek in other folders on your Mac?
Select the folder. Choose 'Info' from the File menu.
At 'Sharing & Permissions' you'll find several settings.
Change the setting at 'Everyone' into 'Read and Write'.
Drop Box: changing privigeles
Network users only are allowed to drop things in the Drop Box folder. They are not allowed to peek.
Would you like them to see what is in the Drop Box? Then you have to change the Sharing Permissions of the Drop Box folder.
Opening Drop Box to other eyes
Select the Drop Box folder. Choose 'Info' from the File menu.
At 'Sharing & Permissions' you'll find several settings.
Change the setting at 'Everyone' into 'Read and Write':
TIP
Opening more folders
Would you like to let your network palls take a peek in other folders on your Mac?
Select the folder. Choose 'Info' from the File menu.
At 'Sharing & Permissions' you'll find several settings.
Change the setting at 'Everyone' into 'Read and Write'.
Download for free Mob Control APK Files.
Disclaimer: MacMiep is independent. This means she writes what she wants, based on 20+ years of Mac-experience. She doesn't get paid for stories (positive or negative) on this website.