How to connect your Mac to the internet
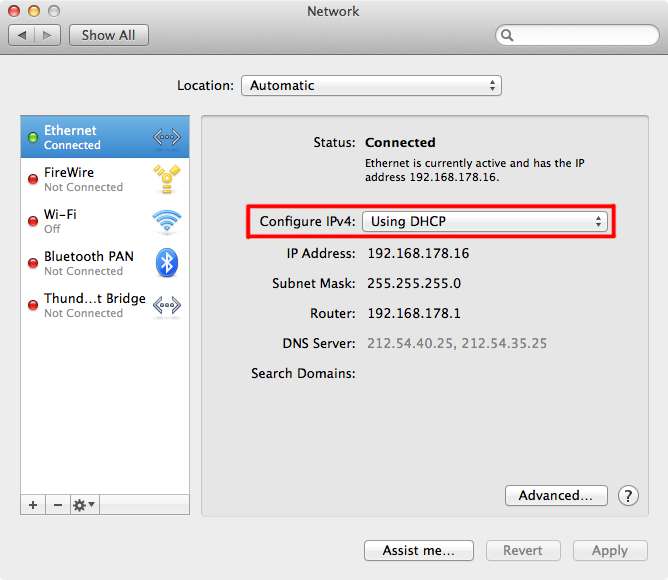
By cable connectionAs soon as you use a UTP ethernet cable to connect your Mac to an ethernet modem, you are online, at least in most cases. Most modems give out so-called 'dynamic IP-addresses' and your Mac's default setting is exactly this.
You can find those settings at System Preferences => Network. Select Ethernet, and choose at Configure IPv4: 'Using DHCP'
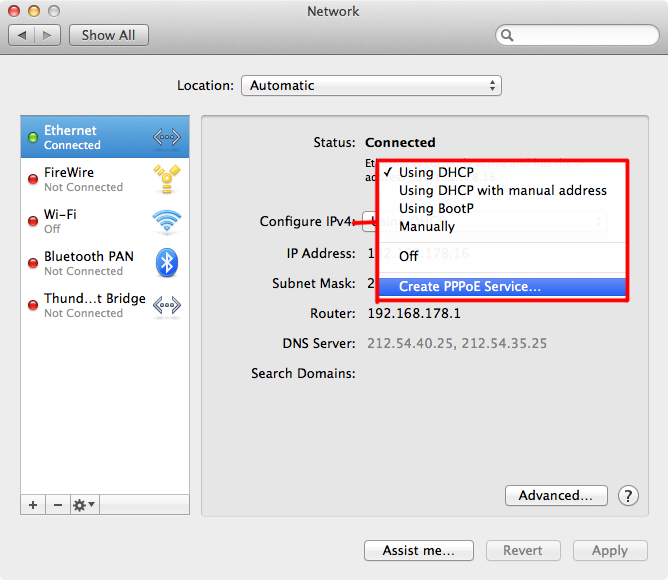
PPoE
Some internet providers use the PPoE protocol. Then you choose
Configure IPv4 => Create PPPoE Service...
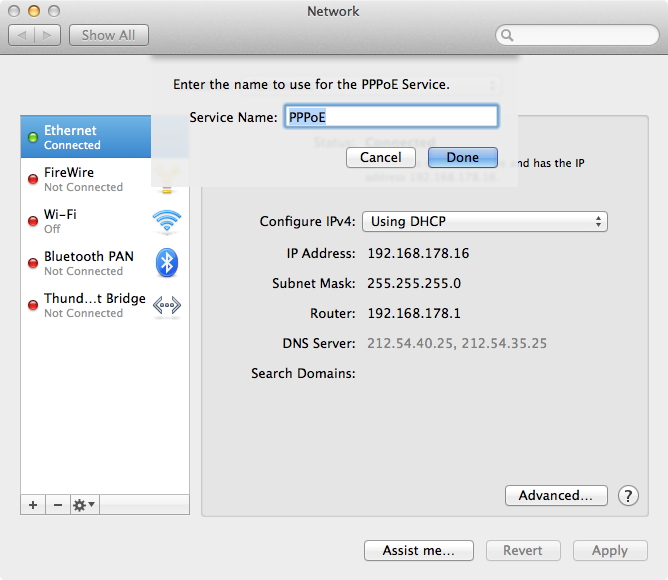
First give the PPPoE Service a name. This name can be given to you by your provider. Then fill in your Account Name and Password, also given to you by your internet provider.
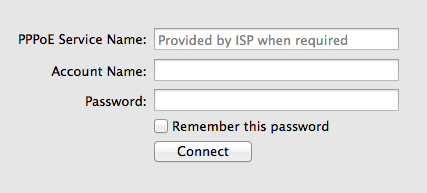
NOTE: Please mind that passwords and account names are capital letter sensitive.
wirelesss / Wi-Fi
To use a wirelesss network, there are a few things you need to know:
- the networks name (SSID code)
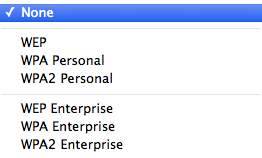
- the type of wirelesss security that is being used (WPA or WEP)
- the password for the network (WPA- or WEP key).
Select a wirelesss network and login
Go to System Preferences => Network and select Wi-Fi.
Choose at Network Name the name of the wireless network.
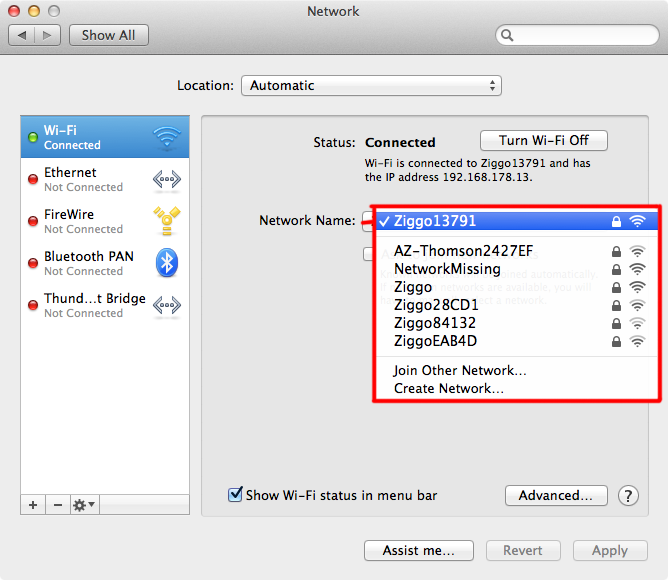
Enter the password (if needed).
Choose the security key (if needed) and fill in the password:
Another way: through the Menu Bar
Go to the Wi-Fi icon in the Menu Bar on the right. Choose your network:
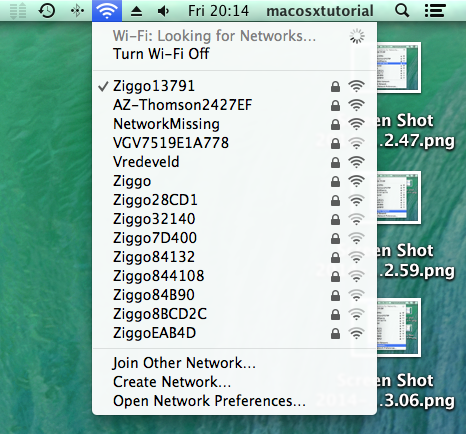
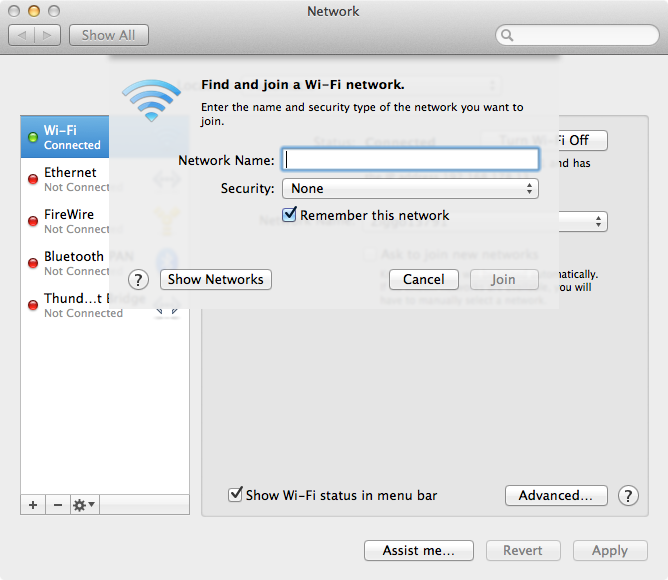
Can't find your network? Then choose Join Other Network.
NOTE: Most wirelesss networks are secured with WPA2 keys. Apple calls‘WPA2 personal’. It might be so that your own network uses a different key. A question of trial and error will help you find the right one.
Create a new Wi-Fi network.
In case you own an Apple Wi-Fi base station called Airport or Airport express, you can create a new network at 'Create Network'.
NOTE: Other non-Apple manufactured base stations can be configured at their internal web page. See the user manual of the apparatus for how to do this.
Surfing with Safari
You use a web browser to surf the Internet. It comes with Mac OS X and it's name is Safari.
You are not obliged to use Safari. Firefox or Google Chrome are some excellent alternatives.
The Safari window from left to right

Upper row:
- one page backwards, or back to the page you came from
- one page forward, back to the page you came from
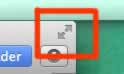
- plus sign: make a bookmark (make a favorite)
- field for the internet address (URL) , with on the upper right the rounded reload-page arrow.
This field is also the Google search engine field. No separate space for this!

Second row:
- glasses are button that puts the page on the 'reading list'. It downloads the page so that you can keep on reading later in case no internet connection is available
- book icon is the button that shows all your bookmarks
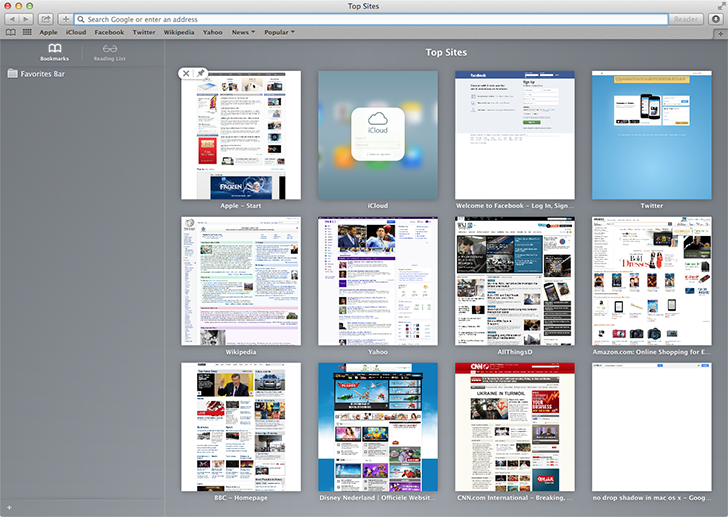
- the Favorites Bar: you can drag and drop your upper favorite bookmarks in here
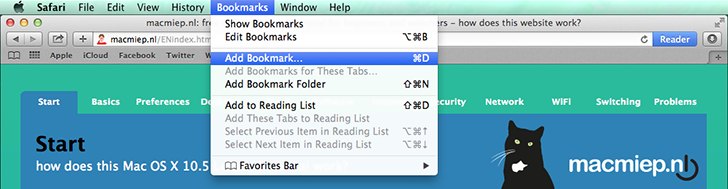
Bookmarks
To add a Bookmark, go to the Bookmarks menu and choose Add bookmark...
Put a bookmark in the Favorites Bar
Drag and drop your upper favorite sites in here.

Then give it a (short) name.

Totally fill the screen
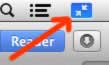
Use the little arrows icon to enlarge the Safari window to the whole screen.
Move your mouse towards the upper right of the screen. The menu bar will appear with a blue icon and arrows. Click it to go back to window view.
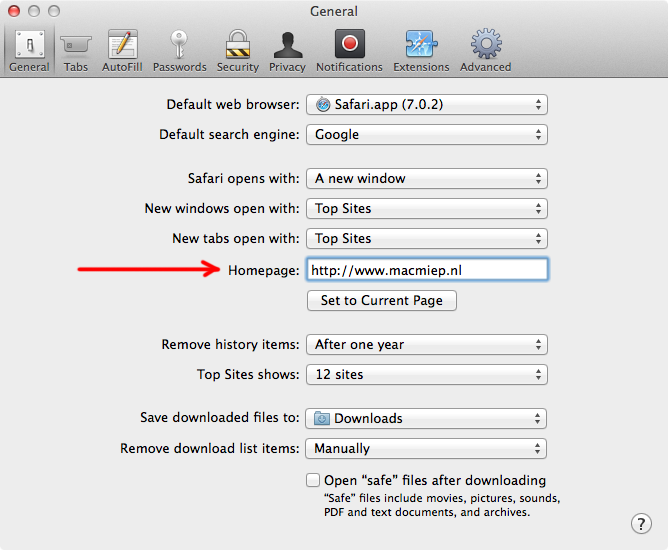
Homepage or startpage
At default, Safari goes to the Apple website at start up. Don't lik this?
Go to the Safari menu and choose Preferences...
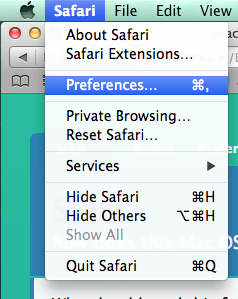
Choose your favorite opening page at 'Homepage'. Or leave it blank for a blank page at start up.
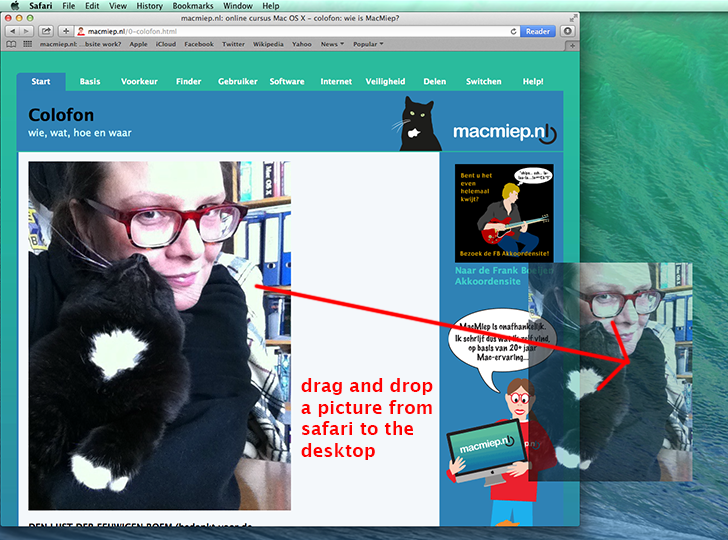
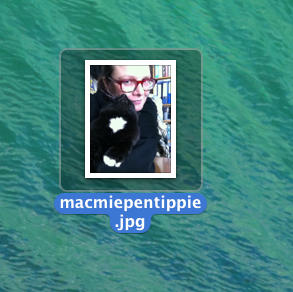
Downloading images
Just use 'drag and drop': click the picture and drag it to the Desktop.
And there it is:
Downloading images by right-clicking
You can also use a right click to open a menu. Now you can choose to save your image to the 'Downloads' folder, add it to your iPhoto Library or use it as a Desktop picture.
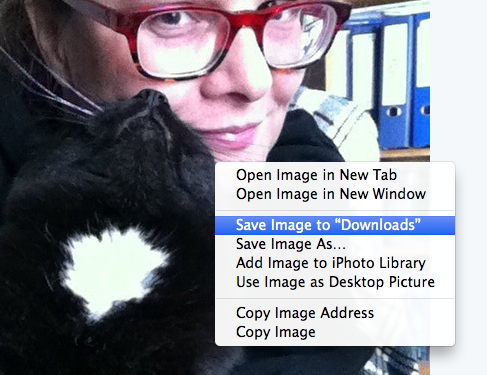
NOTE: occassionally, pictures won't download because web masters don't allow it.
TIP
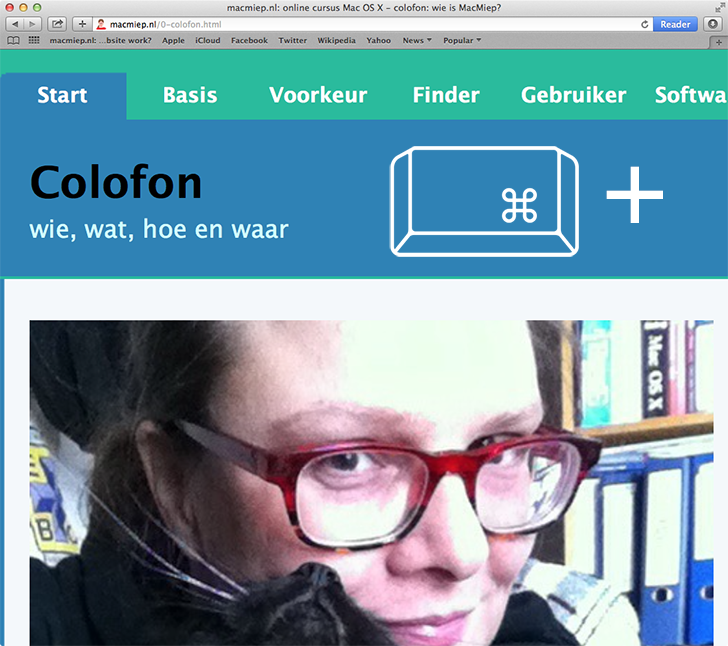
Small characters in Safari?
Use Command + to make it all bigger (and Command – to make it smaller). Very convenient for MacMiep, with her cat at her lap and leaning back in her desk chair she can still surf the internet!
TIP
Email a complete internet page?
Choose Command-i in Safari and Mail wil make a new email with the complete and formatted content of the webpage.
TIP
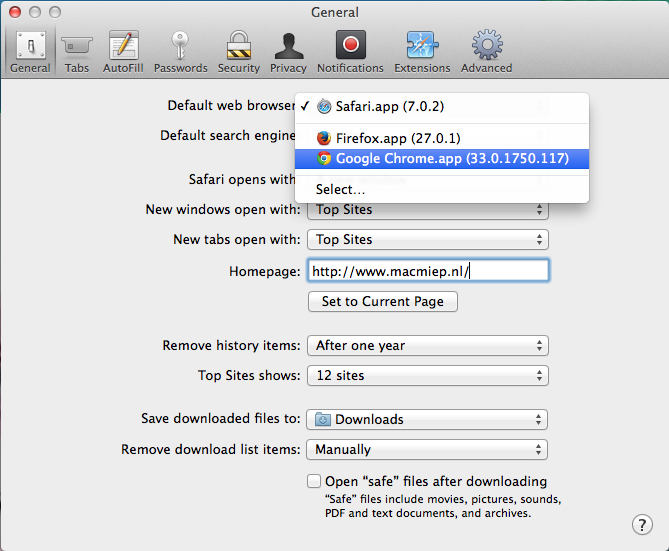
Changing default browser
Ad default, Safari is the browser to open all web pages. Don't like this? Go to the Safari Preferences => General, and choose another browser at 'Default web browser'.
TIP
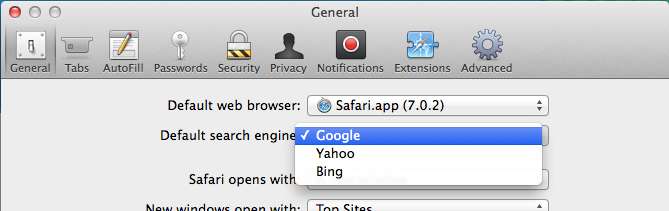
Changing default search engine
Hate the Google search engine?
Go to Preferences=> General and choose an alternative at 'Default search engine'.
TIP
Plug-ins in Safari
Quite often you'll land on a website which plays animations or movies. For this, Safari needs so-called plug-ins: extra software.
You can see what plug-ins are installed at the Help menu => Installed plug-ins.

Small characters in Safari?
Use Command + to make it all bigger (and Command – to make it smaller). Very convenient for MacMiep, with her cat at her lap and leaning back in her desk chair she can still surf the internet!
TIP
Email a complete internet page?
Choose Command-i in Safari and Mail wil make a new email with the complete and formatted content of the webpage.
TIP
Changing default browser
Ad default, Safari is the browser to open all web pages. Don't like this? Go to the Safari Preferences => General, and choose another browser at 'Default web browser'.
TIP
Changing default search engine
Hate the Google search engine?
Go to Preferences=> General and choose an alternative at 'Default search engine'.
TIP
Plug-ins in Safari
Quite often you'll land on a website which plays animations or movies. For this, Safari needs so-called plug-ins: extra software.
You can see what plug-ins are installed at the Help menu => Installed plug-ins.
Electronic Mail
The standard program for email is 'Mail'. Email works like this:
1. You have your own mailbox at the post-office: This is the place on the mail-server at your provider that's yours, on the POP-server.
2. To open this mailbox at the office you'll need a key: The key is the login name and password your provider gave you. 3. To send mail, there's a a public mailbox in your street: This is the outgoing mail-server of you provider. SMTP-server or POP3-server. 4. However: to put your letter in the public mailbox, you'll need to live in the same street as the mailbox.: Only when you're on your provider's network, you're allowed to send mail through their mail-server.
Note: The reason internet providers only let their own customers send mail via their servers is obvious: anonymous mail-sending results in a huge amount of spam. Mail
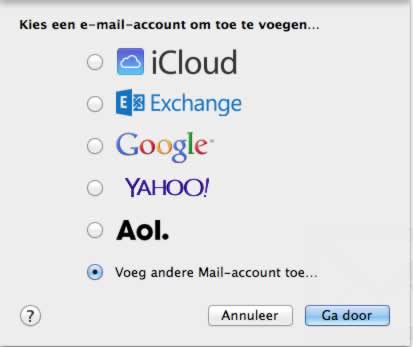
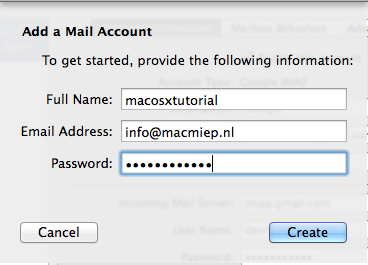
Configuring the Mail program is easy. Starting up for the first time it will ask you the appropriate questions by itself:
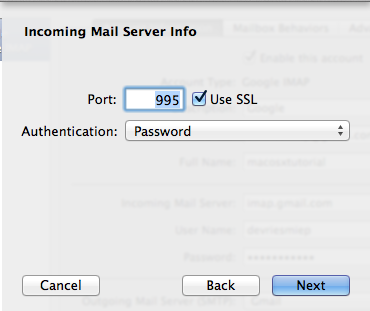
NOTE SSL is optional and makes that your email is being send through a secured connection.
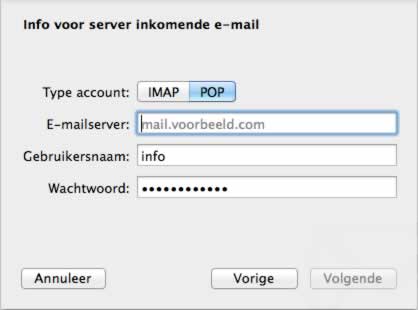
Choose POP of IMAP:
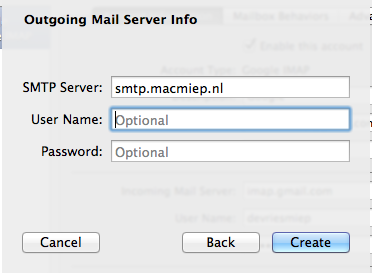
Outgoing mailserver info:
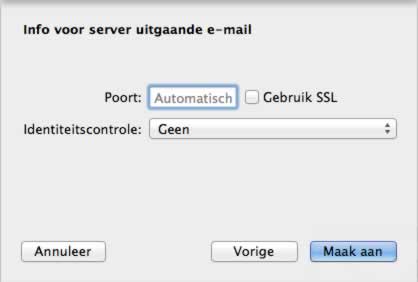
Identity control at sending email
Some email services demand an identity control before you are allowed to use their outgoing mail servers.
Port
Some providers may have blocked default email ports. You can choose the port you need to use here:
Some email services demand an identity control before you are allowed to use their outgoing mail servers.
Port
Some providers may have blocked default email ports. You can choose the port you need to use here:
Account data
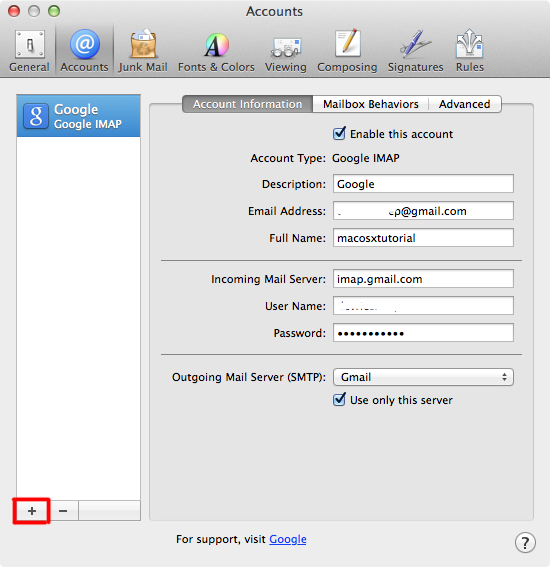
Want to configure more Mail accounts? Go to the Mail Menu => Preferences => Accounts and click the + symbol:
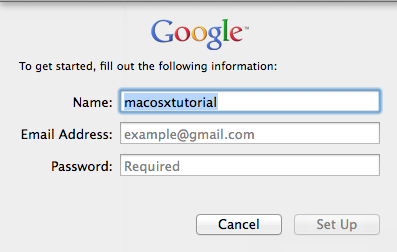
Gmail
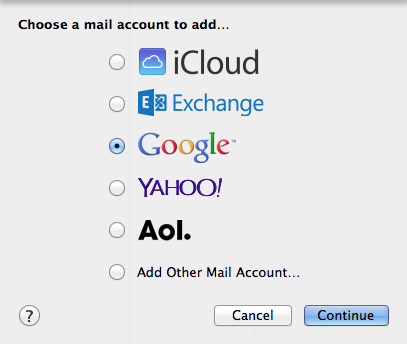
Go to Preferences => Accounts. Click the + symbol to make a new account. Choose Google.
Mail will fill in the rest of the servers for you, you only need to fill in your password.
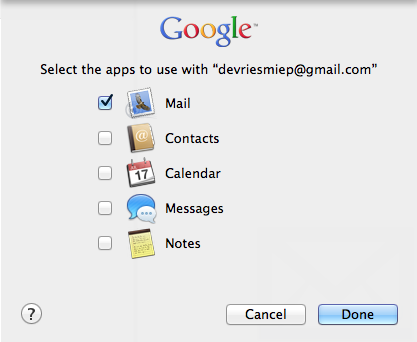
Google+
In case you want to use other Google services, just choose them here. Google contacts will now appear in the Contacts program etcetera.
The Mail program window
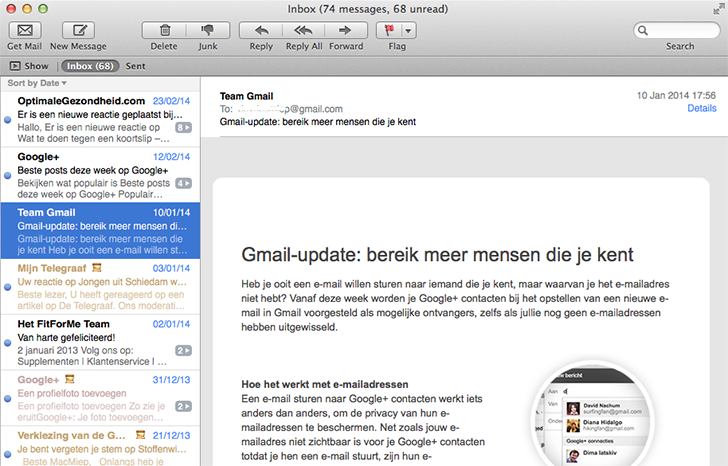
Upper bar from left to right:
Envelope - get new mail
Pen and paper- create a new email (Command + N)
Trash - throw away this email
Thumbs down - declare an email as Junk mail
Arrow to the left- reply to this email
Double arrow to the left- reply this email to all addressees
Arrow to the right- forward this email
Flag - mark the email with colors
Search window -type your search word here

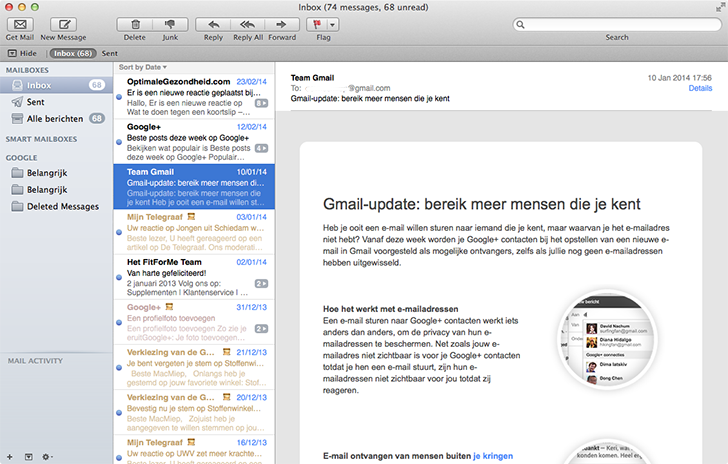
Show
Click 'Show' to show all your email folders:

Light blue area from top 'till bottom:
Inbox - all new emails will arrive here
Concepts - mails you've been working on but haven't been sent yet
Sent - your sent emails
Junk mail - spam folder
Trash - thrown away email
A new email:

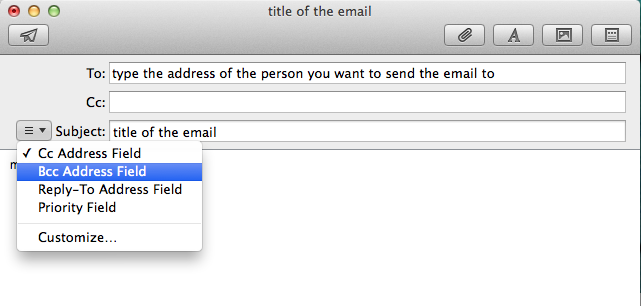
Carbon Copy and Blind Carbon Copy
CC and BCC can be found here:
Atatchments
Use Drag and Drop to throw Atatchments into your email.
NOTE: It may be wise to compress / zip your Atatchment first (more about compressing files in chapter Software).
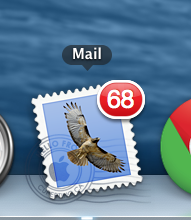
Mail in the Dock
The Mail icon in the Dock tells you when new mail has arrived and more:
Mail Preferences
Go to Preferences at the Mail Menu and configure Mail according to your wishes:
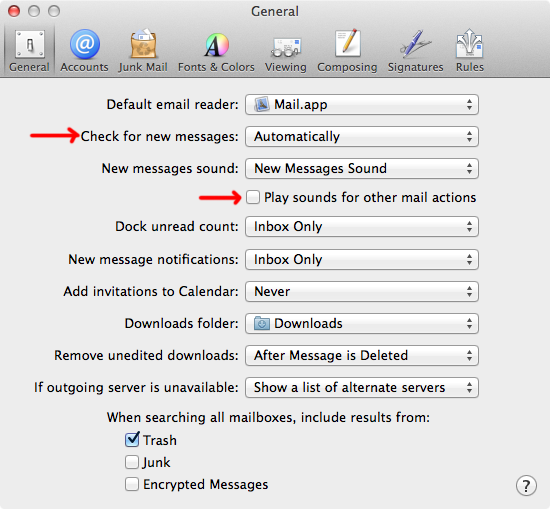
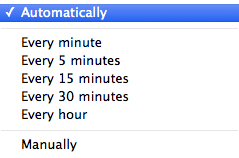
For example how often Mail has to get new email and what sounds you want it to make.
TIP
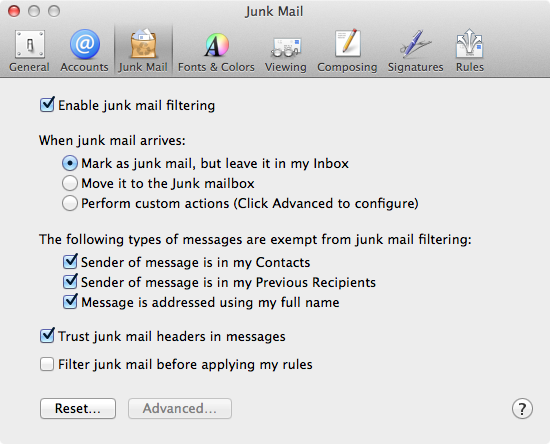
Spam / Junk Mail
You can turn on the filter for Junk Mail at Preferences too:
TIP
Declare email as spam
Right-click on the e-mail and choose 'Mark as Junk'.
TIP
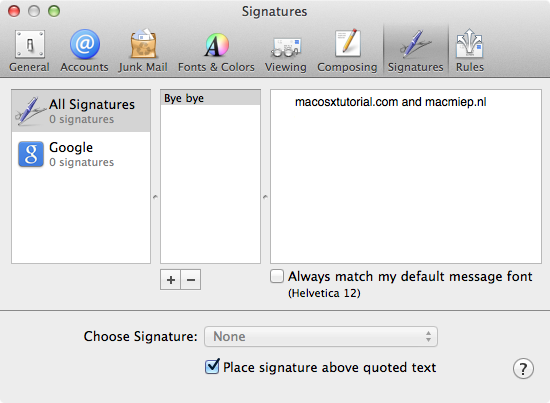
Signatures
Would you like to have personal info or other comments at the bottom of every email you send? Use Signatures to make your own. You can drag and drop pictures in here too.
TIP
Small characters in an email?
Use Command + to make them bigger (and Command - to make them smaller)
Spam / Junk Mail
You can turn on the filter for Junk Mail at Preferences too:
TIP
Declare email as spam
Right-click on the e-mail and choose 'Mark as Junk'.
TIP
Signatures
Would you like to have personal info or other comments at the bottom of every email you send? Use Signatures to make your own. You can drag and drop pictures in here too.
TIP
Small characters in an email?
Use Command + to make them bigger (and Command - to make them smaller)
WAARSCHUWING
Sending email and changing internet provider
Mind that you send your email through the email server of the provider you are using at that moment. Many providers block email that ain't using their servers.
Sending email and changing internet provider
Mind that you send your email through the email server of the provider you are using at that moment. Many providers block email that ain't using their servers.
SWITCH-TIP
Working with Microsoft Exchange Server
Ask your System Administrator to turn on the Autodiscover-function of MS Exchange. Like this it's easy to create an Exchange-mail-account with the login name and password you have been given. Contacts en iCal (agenda) will also work together with MS Exchange.
Working with Microsoft Exchange Server
Ask your System Administrator to turn on the Autodiscover-function of MS Exchange. Like this it's easy to create an Exchange-mail-account with the login name and password you have been given. Contacts en iCal (agenda) will also work together with MS Exchange.
Download for free Runner Games APK Files.
Disclaimer: MacMiep is independent. This means she writes what she wants, based on 20+ years of Mac-experience. She doesn't get paid for stories (positive or negative) on this website.